5.0 - Last modified on 2026-02-27 Revised by Sara Grady
4.0 - Last modified on 2021-03-25 Revised by Sara Grady
3.0 - Last modified on 2020-07-30 Revised by Sara Grady
2.0 - Created on 2020-07-28 Authored by Sara Grady
Question
Creative Cloud will not uninstall completely / or when downloading it says Trial version following: Request a license for Adobe Creative Cloud for Faculty & Staff
Answer
Step 1 of 2
-
- Back up all files stored in Adobe product directories, including custom plug-ins or profiles, if installed.
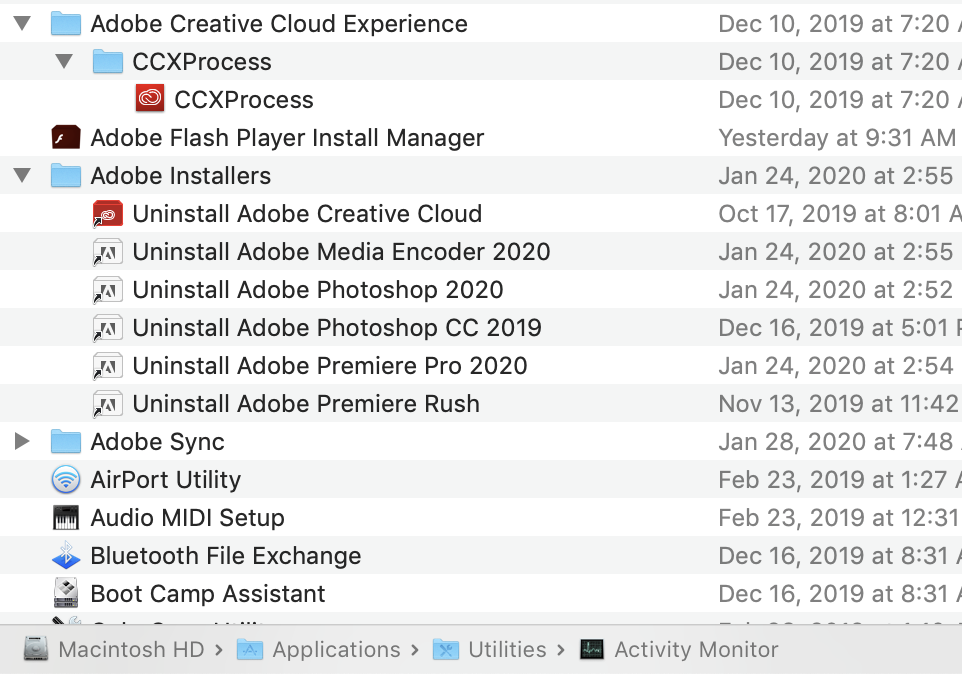
- To uninstall Creative Cloud or Creative Suite applications, in the Finder, navigate to Applications > Utilities > Adobe Installers.
- Double-click the application’s uninstaller.
- Follow the onscreen instructions to complete the uninstall.
- Restart your computer.
|  |
Step 2 of 2
-
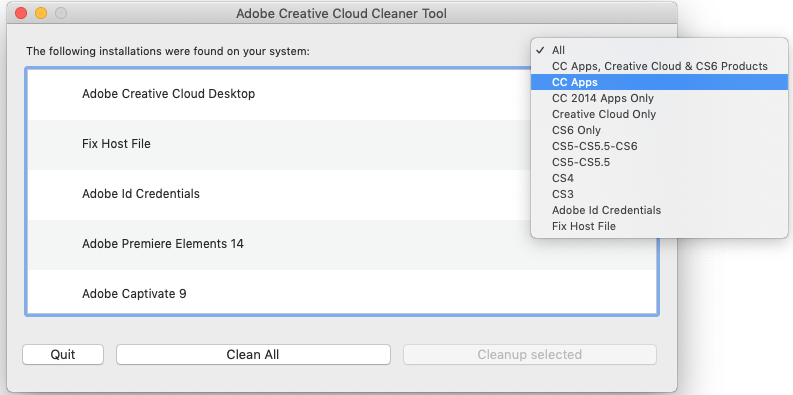
- Download the Adobe Creative Cloud Cleaner Tool for Mac: click the link to download the file - AdobeCreativeCloudCleanerTool.dmg.
- Double-click the Adobe Creative Cloud Cleaner Tool and follow the onscreen instructions:
- Select your language from the menu in the upper-right corner.
- Select All from the menu in the upper-right corner of the window to clean up all installer-related files.
- When you see the message “Adobe Creative Cloud Cleaner Tool completed successfully,”
- Empty the Trash
- Click Quit and restart your computer.
- Once you have successfully run the Adobe Creative Cloud Cleaner Tool, install Adobe Creative Cloud. For instructions see: How do I download and install Adobe Creative Cloud
|  |